
How to Add Email Notifications to Any HTML Form
Learn how to add email notifications to any HTML form so you can receive alerts, store submissions, and respond to enquiries faster.
An HTML form is one of the easiest ways to collect information from website visitors.
You can use it for a contact page, quote request, booking enquiry, support request, or feedback form.
The form may look simple, but there is one important thing it cannot do on its own.
It cannot reliably send email notifications by itself.
HTML creates the visible form fields.
It does not automatically receive submissions, send emails, store responses, or manage customer enquiries.
To receive email alerts when someone submits your form, you need to connect the form to a backend or form submission service.
Why HTML Forms Need a Backend for Emails
An HTML form is only the front part of the process.
It allows visitors to enter information such as:
- Name
- Email address
- Phone number
- Message
But after someone clicks Submit, the submitted information needs somewhere to go.
A backend receives the submission and then sends the notification email to your team.
Without that backend, the form may appear complete but still fail to notify anyone.
What Email Notifications Should Do
A good email notification should help your team respond quickly.
It should clearly show:
- Who submitted the form
- Their contact details
- Their message
- The date of submission
- Which form they used
This makes it easier to understand the enquiry without logging in immediately.
However, email should not be the only place where submissions are stored.
Why Email Alone Is Not Enough
Email notifications are helpful, but they are not perfect.
Emails can be:
- Sent to spam
- Deleted accidentally
- Missed during busy days
- Buried under newer messages
- Filtered into another folder
That is why every form submission should also be saved somewhere reliable.
A dashboard gives your business a backup record even if an email notification is missed.
Connect Your Existing HTML Form
You do not need to rebuild your HTML form just to add email notifications.
If the form already looks good and works well for visitors, keep it.
The better approach is to connect the existing form to a backend that can receive the data and send alerts.
This allows you to keep:
- Your current form design
- Your website layout
- Your branding
- Your button style
- Your customer experience
Only the submission destination changes.
Add Notifications With SmartFormify Connect
SmartFormify Connect allows you to connect an existing HTML form to SmartFormify.
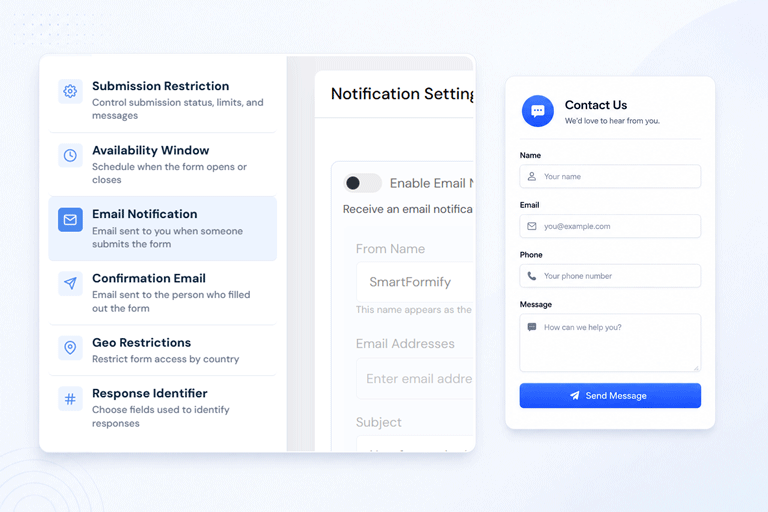
Once connected, SmartFormify can receive the submission and send notification emails to your selected team members.
It can also store the response in your dashboard, apply spam protection, and show the correct after submission message.
This gives your HTML form the backend features it needs without changing how it looks on your website.
Send Notifications to the Right People
Not every enquiry should go to the same person.
A general contact form may notify your admin team.
A quote request form may notify your sales team.
A support form may notify customer support.
When setting up email notifications, choose the people who need to act on the submission.
This helps avoid confusion and makes follow up faster.
Use a Clear Email Subject
The subject line should make the notification easy to recognize.
For example:
New Website Enquiry
New Quote Request
New Booking Request
A clear subject helps your team quickly understand what kind of enquiry has arrived.
Include the Submitted Details
The notification email should include the important form details.
For example:
- Customer name
- Email address
- Phone number
- Service requested
- Message
This allows your team to decide how urgent the enquiry is and respond properly.
Use Reply To Carefully
A useful notification email should make replying easy.
When the submitted email address is added as the reply to address, your team can click Reply and respond directly to the person who completed the form.
This saves time and reduces mistakes.
However, this only works when the form includes a valid email field.
Send a Confirmation Email to the Visitor
Email notifications are for your team.
Confirmation emails are for the person who submitted the form.
A confirmation email lets the visitor know their message was received.
This improves trust and reduces duplicate submissions.
For example, a simple confirmation message can say:
Thank you. Your enquiry has been received and our team will review it shortly.
Protect the Form From Spam
Any public HTML form can receive spam.
Before sending every submission to your inbox, make sure the form has basic protection.
SmartFormify Connect supports spam protection options such as a hidden bot check field, source controls, blocked IPs, blocked domains, and blocked phrases.
These features help reduce unwanted submissions while keeping the form simple for real visitors.
Test the Notification Flow
After adding email notifications, test the full process.
Submit a test enquiry and confirm that:
- The form submits successfully.
- The notification email arrives.
- The submitted details are correct.
- The reply to address works if enabled.
- The submission is stored.
- The thank you message appears correctly.
Testing helps you find small mistakes before real customers use the form.
A Practical Example
Imagine a small design agency with an HTML contact form on its website.
The form asks for name, email, project type, budget, and message.
The design looks good, but enquiries currently do not reach the team reliably.
Instead of replacing the form, the agency connects it to SmartFormify Connect.
Now, every submission is saved in the dashboard, email notifications are sent to the team, spam is reduced, and the visitor sees a proper thank you message.
The website looks the same, but the enquiry process becomes much more reliable.
Common Mistakes to Avoid
Many website owners assume an HTML form can send emails by itself.
Others add a form but forget to configure notification recipients.
Some rely only on email and do not store submissions anywhere else.
Another common mistake is never testing the form after setup.
Avoiding these issues helps ensure every genuine enquiry reaches your business.
Final Thoughts
Adding email notifications to an HTML form is not about changing the design of your website.
It is about connecting the form to a backend that can receive submissions and notify the right people.
With SmartFormify Connect, you can keep your existing HTML form while adding email notifications, response storage, spam protection, reply to support, and after submission messages.
This gives your business a more reliable way to receive enquiries without rebuilding the form your visitors already use.
Share this post


Latest posts
8 min read
How to Collect Leads From ChatGPT, Lovable, Bolt and Other AI Websites
7 min read
How to Connect AI Built Websites to a Form Backend
8 min read
How Agencies Can Manage Client Website Forms More Efficiently
8 min read
Best Contact Form Solution for Small Businesses
5 min read
How to Centralize Leads From Multiple Websites